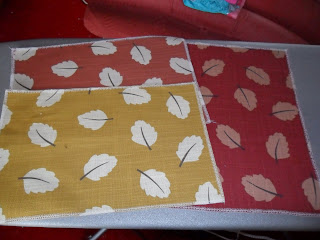
I find this class a bit tricky to plan and have spent ages planning this new course. I try to think of a project that we can complete in a couple of hours and that most people would want to make that will increase their basic sewing skills so that when the leave me in ten weeks, they will be able to make what they want, alone. Oh and we have two sewing machines for the whole class of sometimes 10.
So this week was our first week. I'd never met the mums before and I didn't know what kind of skills they had so I decided cushion covers would be a good place to start. Easy cutting out, basic straight stitch to get used to the machines and surely everyone needs another cushion in their lives..unless you are Mr Nicsknots who says we have too many.
A few people have asked if I will do tutorials for them in the past and on Monday, I got asked again so I decided it was about time to take the plunge into tutorial world so bare with me here.
First you need to decide what size cushion you want to make. I have a stash of 14inch cushion pads so I went with that. 14 inches = 36ish cm and from here we will use centimetres.
You will need a square for the front measuring the size of your finished pad plus 1cm each side for the seam allowance so here we have a 38cm square.
For the envelope back, we need two rectangles, each 2/3 the height of the front so 38 cm wide and 26cm high.
I have over-locked the edges of the pieces because I have an over-locker but if you don't have one, don't worry, it's fine. I have ironed all of the pieces though and not wanting to sound like my textiles teacher from school, but you know, it's helpful if you have flat pieces to start with.

Next you need to fold your 1cm seam allowance down on the top of each back piece. Again, I iron these down as I find it easier.
 If you feel the need to pin, put you pins in at right angles then you can sew over them without breaking your needle and stabbing yourself in the eye (Yep, someone did that last term, I'm trying to avoid it this time!) and also, you don't stab your hand as you move it along the fabric.
 When sewing, keep the edge of your fabric lined up with the 1cm mark on your machine, to give yourself a straight hem.
Next, lay your front material face up and place your back pieces, with right sides facing the front fabric as so....

You need to pin this together then sew all the way around the edge of the square, again with a 1cm seam allowance.
 Snip the corners off your sewn cover. This will produce sharper corners when you turn it the right way around. Careful not to cut any stitching here.
 Now the fun bit, turn the cover right way round through the envelope opening....
 ...and hey presto, you have a fab cushion cover.
Make lots more to distress your husband and please your soft-furnishing obsessed daughter who is still in Royal wedding fever!

Let me know what you think of my tutorial. Next week, it's personalised bunting if you want me to carry on.
4 comments:
It's very good! I like the step by step and the pictures!
Thanks for following me, Nic! Not so many people there as last week (Mel and Lara on hol) but it was still nice. See you next week x
Awesome tutorial!
Looking forward to more :~)
well I managed to follow it OK!
Post a Comment